- Preliminary Notes
- The Menubar
- Basic Data
- Extended Offer Data
- Offer Texts
- Offer Details - Offer Elements and Steps
1. Preliminary Notes
Via the menu item "Products" and the sub-item "Offers" it is possible to access the offers. If offers have already been created, they will be displayed here. By clicking on an Internal Title (1) or the column "Details" (2), the detailed offer overview is opened.
Note: The "Active" and "Archived" tabs (3) can be used to switch between the overviews for currently active or archived offers.
Fig: Menu item Offers
2. The Menubar
Neben dem Angebotstitel oben links ist direkt die Bestellnummer (1) zu erkennen. Darauf folgt ein Menüband (2), über welches auf verschiedene Aktivitäten zugegriffen werden kann.
Next to the offer title in the upper left corner, the Offer ID (1) can be seen directly. This is followed by a menubar (2), which can be used to access various activities.

Fig: Header of the offer details
(1) Zurück zur Liste: Führt zurück auf den Menüpunkt "Angebote".
(2) Angebot archivieren: Angebote können zwar nicht gelöscht werden, aber dafür können sie archiviert werden.
(3) Angebot kopieren: Das Angebot wird mit den selben Komponenten in der "Angebot erstellen" Ansicht geöffnet.
(4) Angebot bearbeiten: Das Angebot kann bearbeitet werden.
(5) Erweiterte Angebotsdaten bearbeiten: Hierüber können zusätzliche Daten, IVW-Regeln und Tags bearbeitet werden. Diese Einstellung kann erst nach dem Erstellen des Angebotes bearbeitet werden.
(6) Zahlungsarten einstellen: Hierüber können für das Angebot eigene Zahlungsarten ausgewählt werden. Diese Einstellung kann erst nach dem Erstellen des Angebotes bearbeitet werden.
(7) Adresseinstellungen: Hierüber kann festgelegt werden, ob eine Rechnungs- und/oder Lieferadressen-Angabe verpflichtend sein soll. Diese Einstellung kann erst nach dem Erstellen des Angebotes bearbeitet werden.
(8) Kündigung im Self Service unterbinden: Wird die Kündigung eines Angebots im Self Service unterbunden, so kann es nur noch durch den Support im plenigo Backend gekündigt werden. Dies kann immer wieder rückgängig gemacht werden.
(1) Back to List: Leads back to the menu item "Offers".
(2) Archive Offer: Offers cannot be deleted, but they can be archived.
(3) Copy Offer: The offer will open with the same components in the "Create Offer" view.
(4) Edit Offer: The offer can be edited.
(5) Extended Offer Data: This can be used to edit additional data, IVW rules, tags and start dates. This setting can be edited only after the offer is created.
(6) Set Payment Methods: This is used to select custom payment methods for the offer. This setting can only be edited after the offer has been created.
(7) Address Settings: This can be used to specify whether an invoice and/or delivery address information should be mandatory. This setting can only be edited after the offer has been created.
(8) Block Cancellation in Self Service: If the cancellation of an offer is prevented in Self Service, it can only be cancelled by the support in the plenigo backend. This can always be undone.

Fig: Menubar in the detailed view
3. Basic Data
At the beginning, an overview with the most important features of the offer is presented. Icons are used for a simple and clear presentation:
(1): indicates what type of offer it is.
(2): indicates how many steps the offer has.
(3): indicates how many products are included in the offer.
(4): indicates how many bundles are included in the offer.
(5): indicates whether the offer is a multi-user offer. The multi-user count is included in the icon. If the multi-user count is over 9, this is noted with an "n" after the "U".
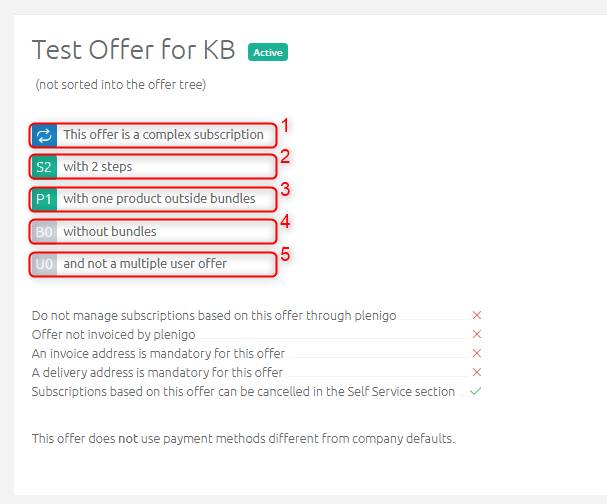
Fig: Basic data icons
Below the icons, further features are displayed in the form of a text, which are marked either by a check mark in case of approval or by a cross in case of rejection (1). In addition, the payment types that differ from the company settings are linked, if applicable (2).
Note: Some aspects can only be edited after an offer has been created. In (1) you can see that the last item has a green check mark. However, this could not be set during offer creation, as all offers can be cancelled by default in Self Service. If you don't want this, you can use the menubar to "Block Cancellation in Self Service". The setting whether the invoice or delivery address should be mandatory can also be managed only after creation. The deviating payment types mentioned in (2) can also only be set after creation.
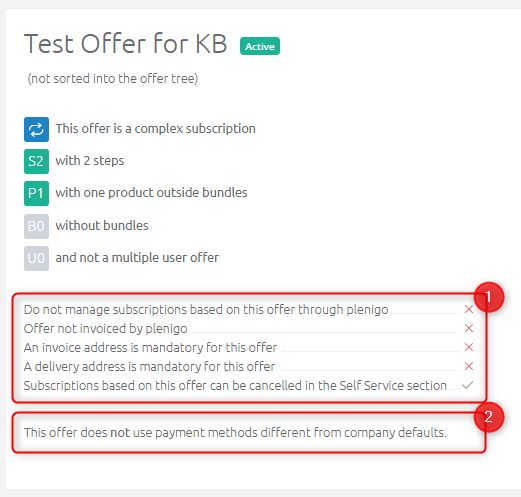
Fig: Basic data of the offer
After the basic data, it may be that a note follows in case, for example, delivery lists or account sheets have been created but not assigned to the offer. Additionally, information about sales rules (1) is displayed as well as information about active contract modules (2). More detailed documentation on sales rules and contract modules can be found in our Knowledge Base.
The next section contains information about additional data, IVW rules, tags and bonus. However, these functions can be edited only after the creation of the offer, just in the detailed view.
Fig: Sales rules, contract modules and extended offer data
If applicable, a country selection is displayed if the offer has been configured for multiple countries. If this is not the case, this section is omitted.
Fig: Country Selection
The offer texts defined when creating the offer can be viewed in this area.
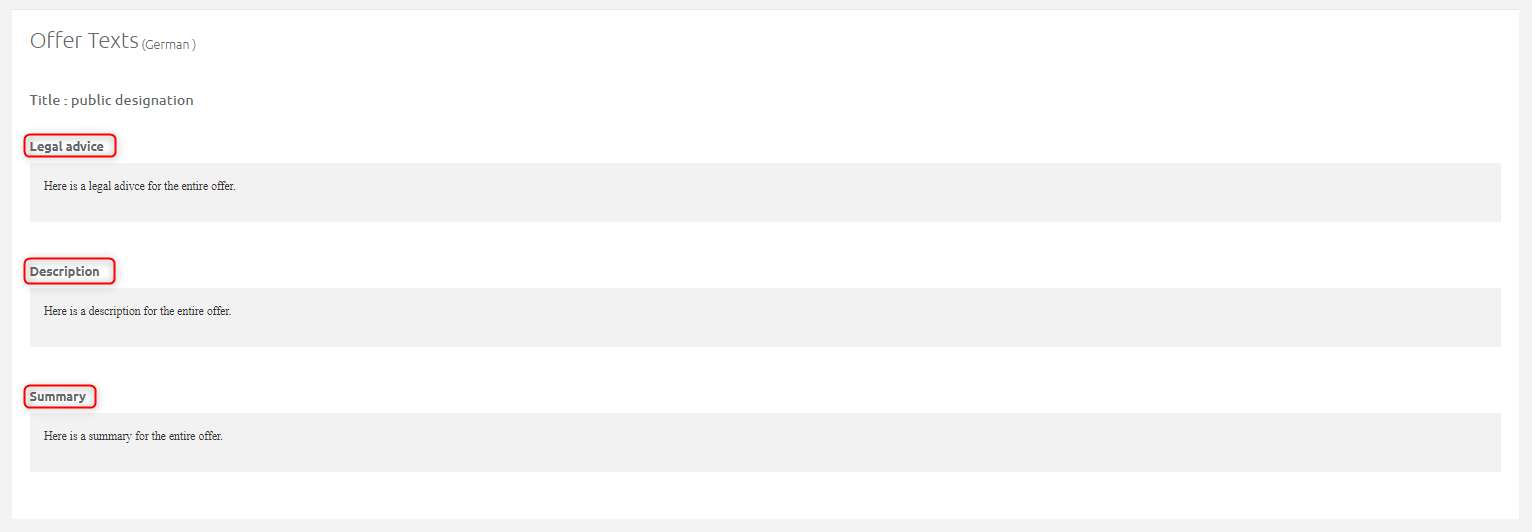
Fig: Offer texts
6. Offer Details - Offer Elements and Steps
The offer elements contain a detailed summary of the offer. This contains information on the Runtime (1), the accounting period (1), and the cancellation period (1). It also shows how many steps (2) and products/bundles the offer contains.
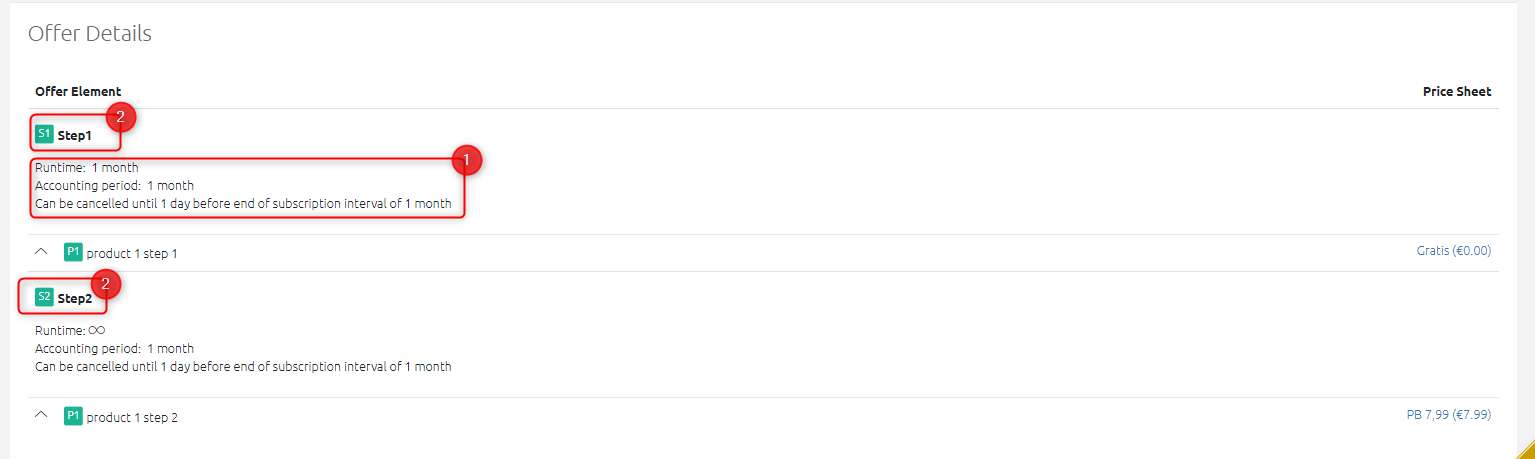
Abb: Offer Elements
By clicking on the navigation arrow to the left of the product, a listing of the most important features of the respective product opens.
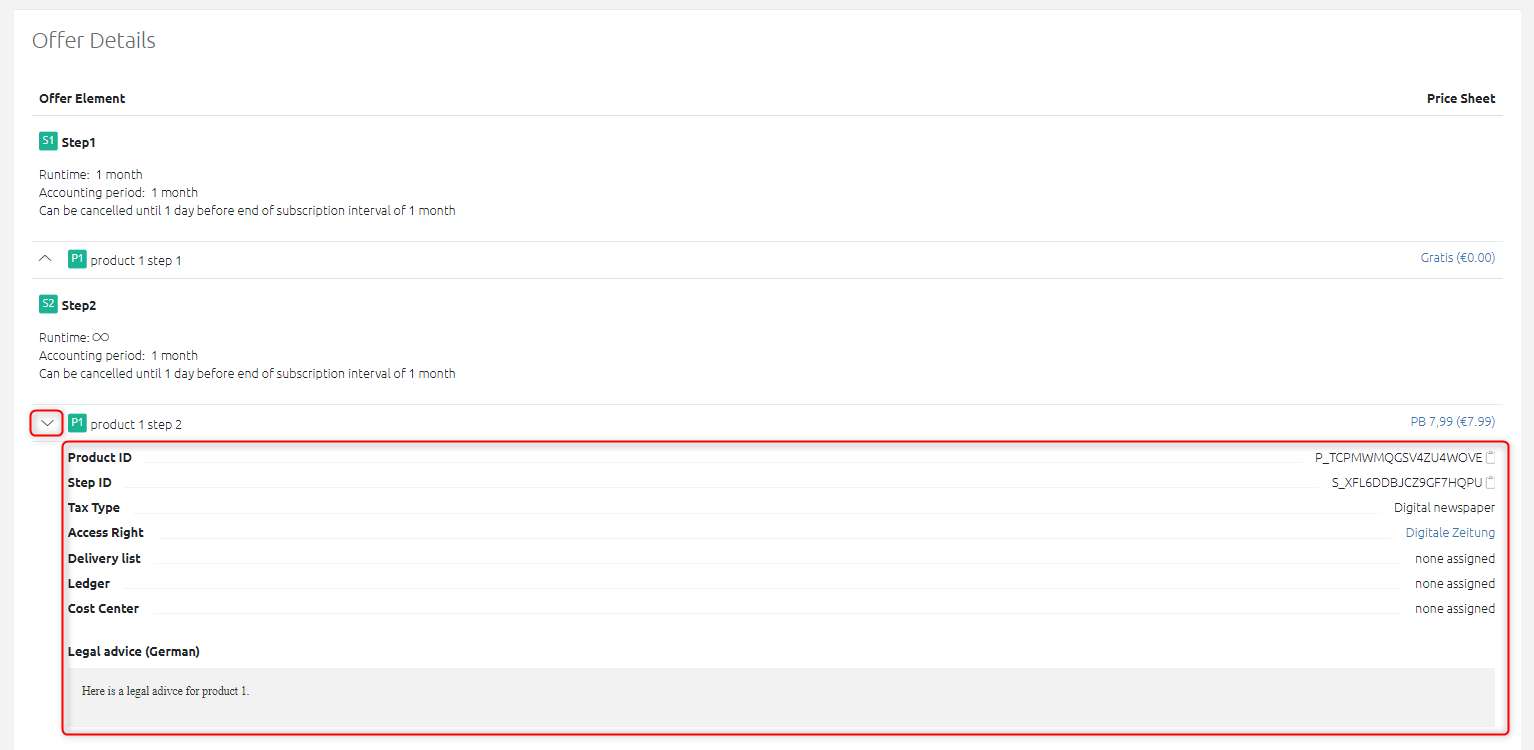 Fig: Offer elements drop-down product details